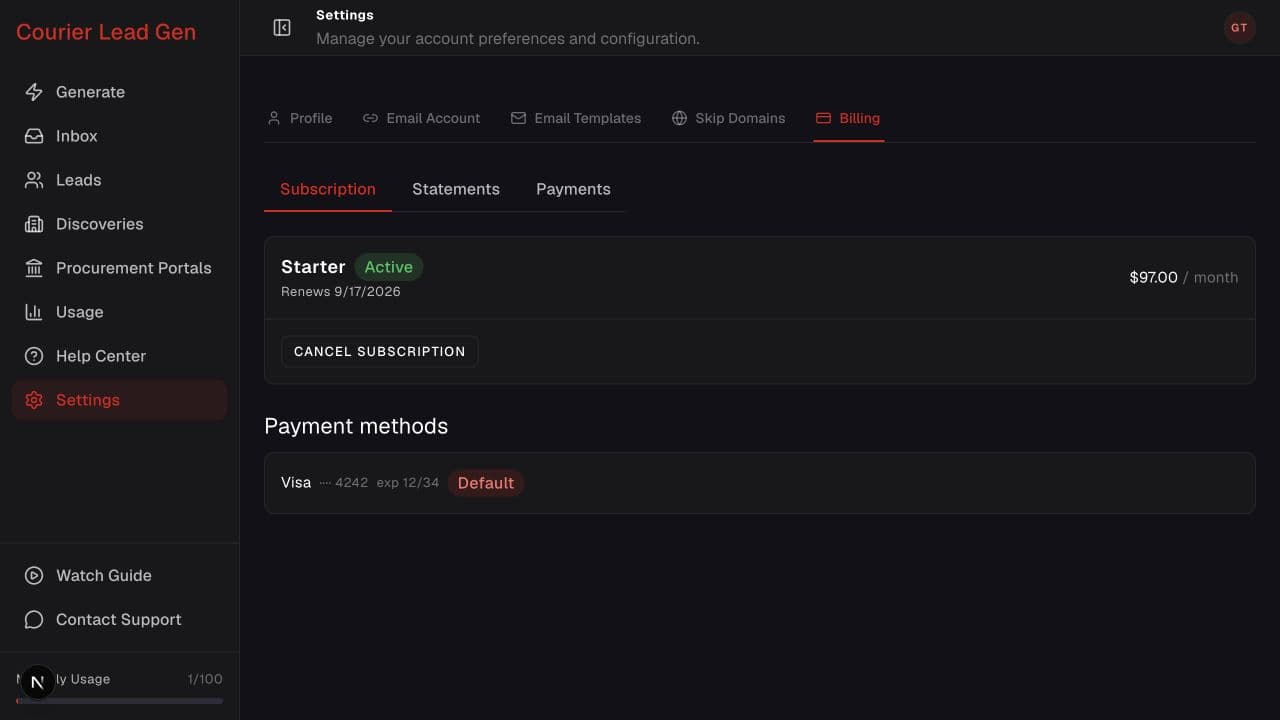
Follow the animated cursor to “Billing”.
1
Step 1 of 5
Open Billing settings
Go to Settings and select Billing. The Billing tab is available to standard paid accounts.
Stop future renewals while keeping access through the current paid period.
Open BillingStep 1 of 5
Go to Settings and select Billing. The Billing tab is available to standard paid accounts.
Step 2 of 5
Open Subscription to see the active plan, price, and renewal date.
Step 3 of 5
Confirm the plan and renewal date before cancelling. Cancellation prevents the next renewal.
Step 4 of 5
Select Cancel Subscription underneath the active plan. This app applies the cancellation immediately; there is no second confirmation dialog.
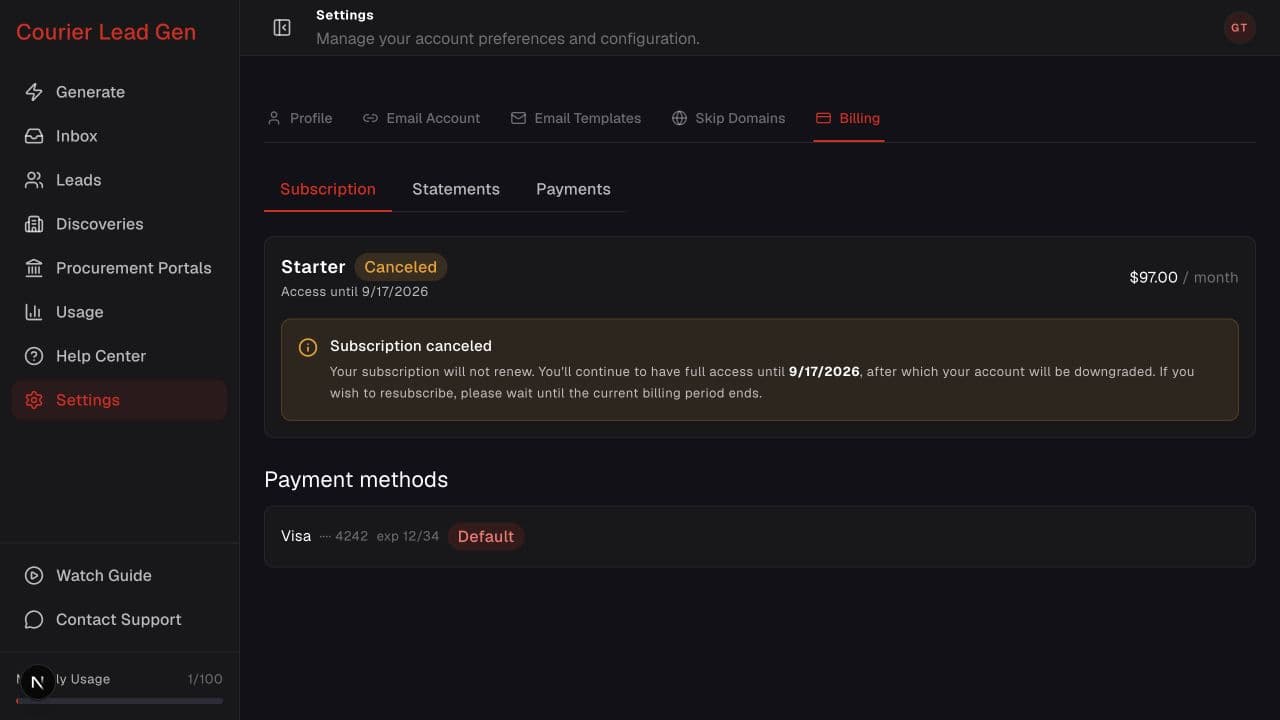
Step 5 of 5
After cancellation, confirm that the status says Canceled and read the date through which access remains available.
Open the feature and follow the same steps in your account.
Open Billing